In this tutorial, with a few quick simple steps, you will learn how to make a Sepia effect in photoshop. This tutorial’s difficulty level is; beginner.
So what exactly is Sepia?
Sepia is a monochrome image rendered in brown tones rather than greyscale tones that are normally used in black and white photography. The invention of sepia tones being used in photographs dates back to the mid-1800s.
The word sepia, a Latin derivative of the Greek name for common cuttlefish. As the name suggests, photographers originally used cuttlefish to produce pigment and such that create the warm brown tones that make sepia photography so great.
Sepia ink was used by the ancient Greeks to write and was a preferred choice of drawing ink for great masters like Leonardo Da Vinci and Rembrandt.
Luckily for us, no cuttlefish are needed to learn how to create a Sepia effect in Photoshop.
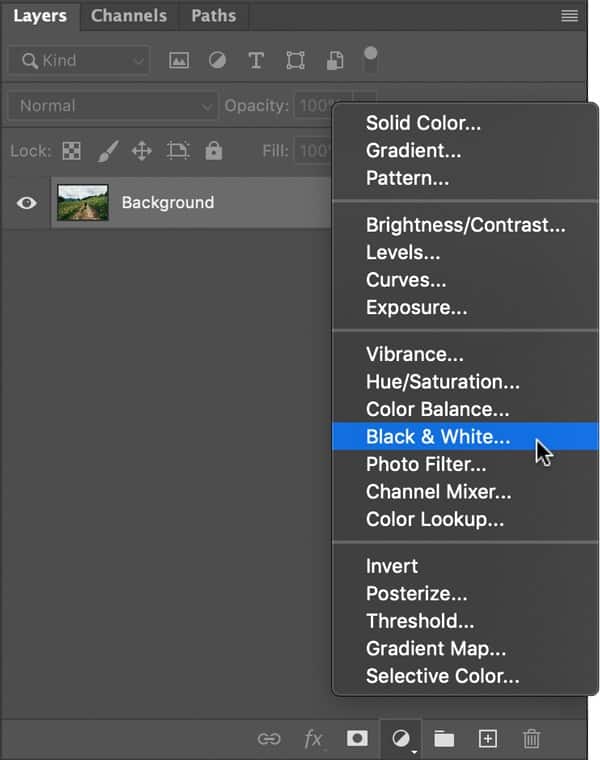
If you don’t have a suitable image at hand but wish to follow the tutorial, you can download up to 10 high-quality stock images FREE with an Adobe Stock trial. Table of Contents Start by opening the image you wish to edit into Photoshop. Before a sepia photo effect can be applied to the image, we first need to remove any colors from the image, to do this we will turn the image black and white so that the sepia photo filter can affect image correctly. Create a black & white adjustment layer by clicking on the adjustment layer icon (half black half white circle) at the bottom right corner of your Photoshop window and selecting Black & White.Free High-Quality Image Resources
Open image in Photoshop

Black and White Adjustment Layer
Click and Drag
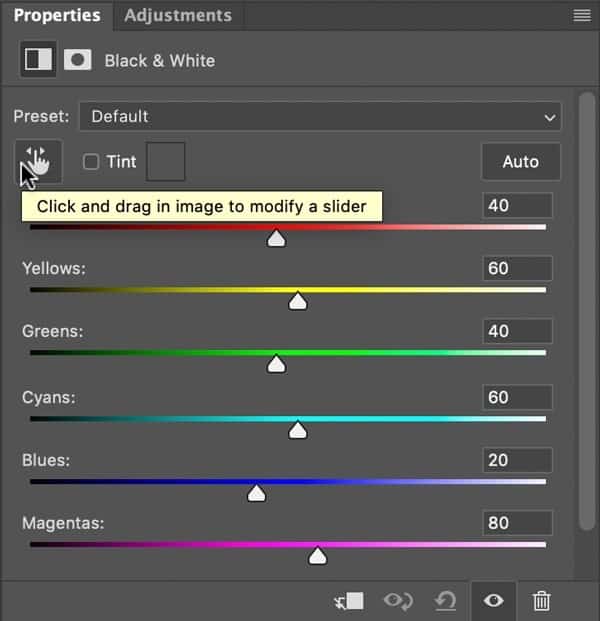
The preset option is set to ‘default’ which will be a basic black and white effect. You may be happy with the default black and white effect if so, just move onto the next step.
Click on the ‘Drag in image’ icon which looks like a hand pointing finger in-between two arrows.
You will notice your mouse cursor will become an eyedropper icon when you hover over the image.

Clicking on an element in your image will change the mouse cursor from the eyedropper icon to the drag in image icon.
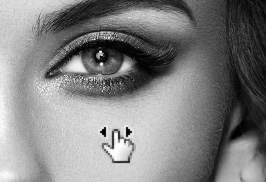
Click and hold on an element in your photograph that you wish to either darken or lighten. Drag left (darken) or right (lighten). In our case, we will click on the face and lighten. Followed by a click and drag to darken the hair.
As a result, Photoshop takes a reference of where was clicked and darkens or lightens all the similar elements in the photo.
The reason why we do this is that sepia photos are essentially black and white photos with a filter. Therefore we have to make our image look it’s best in black and white as this will affect the final sepia effect. If you want an in-depth black and white tutorial, click here.
Sepia Photo Filter
Now that the photograph is black and white, it’s time to add the Sepia photo filter to the image.
Create a photo filter adjustment layer by clicking on the adjustment layer icon (half black half white circle) at the bottom right corner of your Photoshop window and selecting Photo Filter.
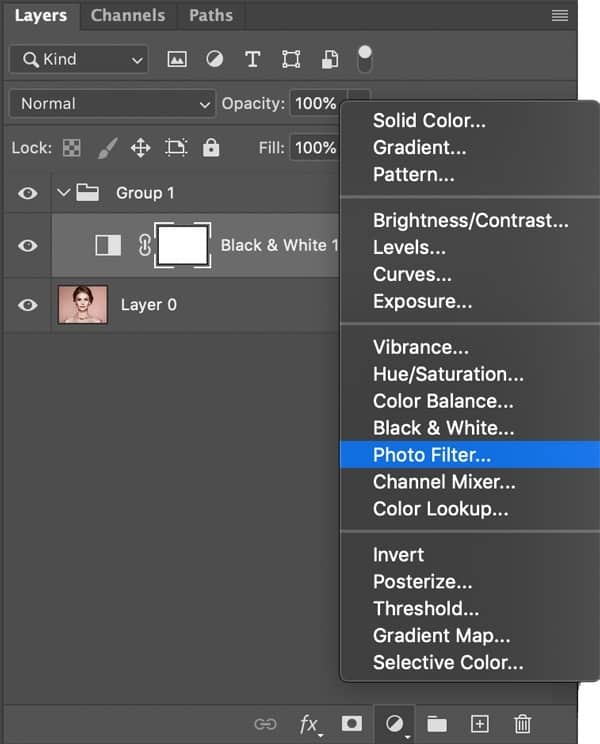
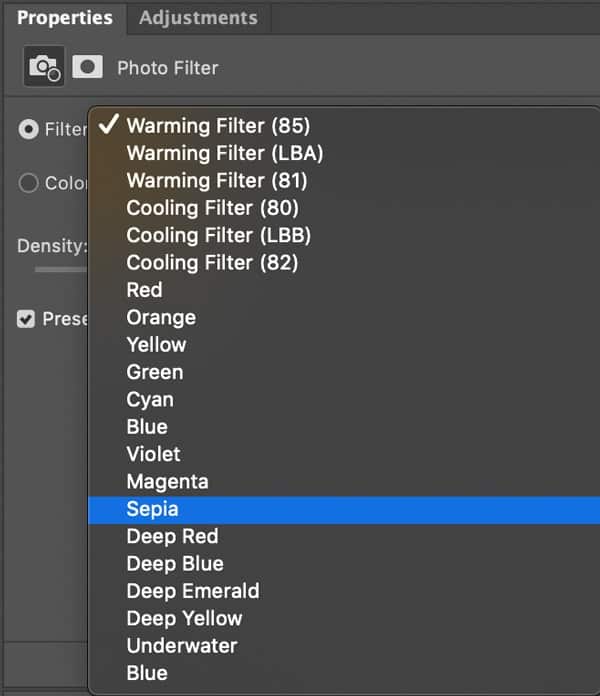
With the photo filter open, click on the filter dropdown menu and choose sepia.
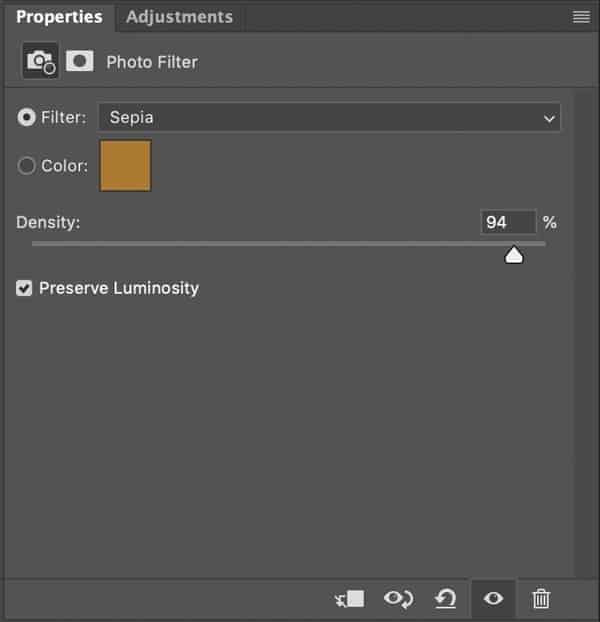
Make sure ‘Preserve Luminosity’ is checked on and increase the density to between 80-100%.
Hello Sepia
Congratulations, you made it to the end of the tutorial. More importantly, you now know how to make a Sepia Effect in Photoshop.

… we have a small favor to ask. More people are reading and supporting Savvy little Pixel, than ever before. Unlike many major websites, we have no funding, no staff but a small team that has full-time jobs that volunteer their free time, creating content with love and passion. We need your support to keep delivering quality content. Every reader contribution, big or small, is so valuable. Support Savvy little Pixel from as little as £1. Thank you. Since you’re here…
![]()